Wacky Pajama Pants

I’m finally back into sewing after moving in August, even though not everything is tidily packed away yet. I was determined to sew some things in time for winter, and these pajama pants by Indygo Junction were at the top of my list.

IMG_1263.jpg

IMG_1259.jpg

The fabric is a kinda crazy flannel I bought a few years ago from Discount Fabrics in Berkeley, CA. It feels like good quality flannel, and hopefully it won’t pill too badly like other flannels I’ve used before.

I did enlarge the pattern by a few inches around, since the largest size for this pattern is a 2x, but I left the ruffled hems the same size just so they wouldn’t flare out quite so much.

I’m debating whether to make the matching top or not. I actually made a pair of these 2 years ago in a black linen and I do wear them out and about, grateful that I live in a somewhat hippie-ish place.

Finally!

I got to sew today.  It’s been more than a month and I was almost ready to tear up.  Strange because I only rediscovered sewing a couple of years ago, out of frustration.  I thought I’d finally, finally try customizing something to my own measurements, just winging it by adding things here and there, not even researching it like I would normally do before trying anything new, and when I tried on the dress I was shocked at how good it felt.  Just right.  And strangely, yet logically, because it felt right, it looked right.

I got to work on my jacket and of course, made a mistake.  Usually it’s not big deal when I do, just pick it out and redo, except with a waterproof jacket, you’re then leaving holes that can leak rain.

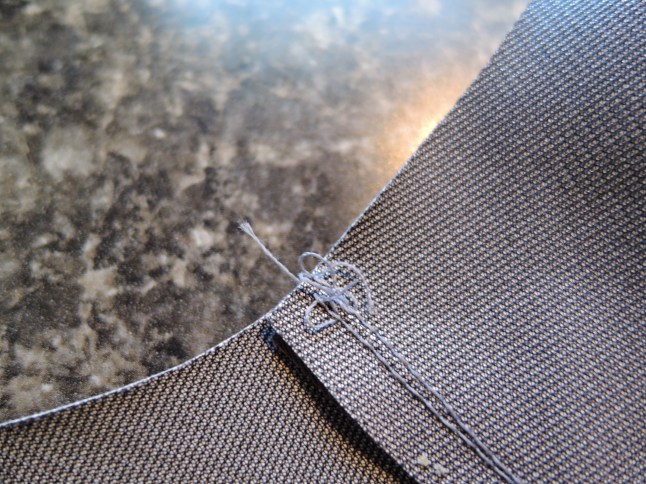
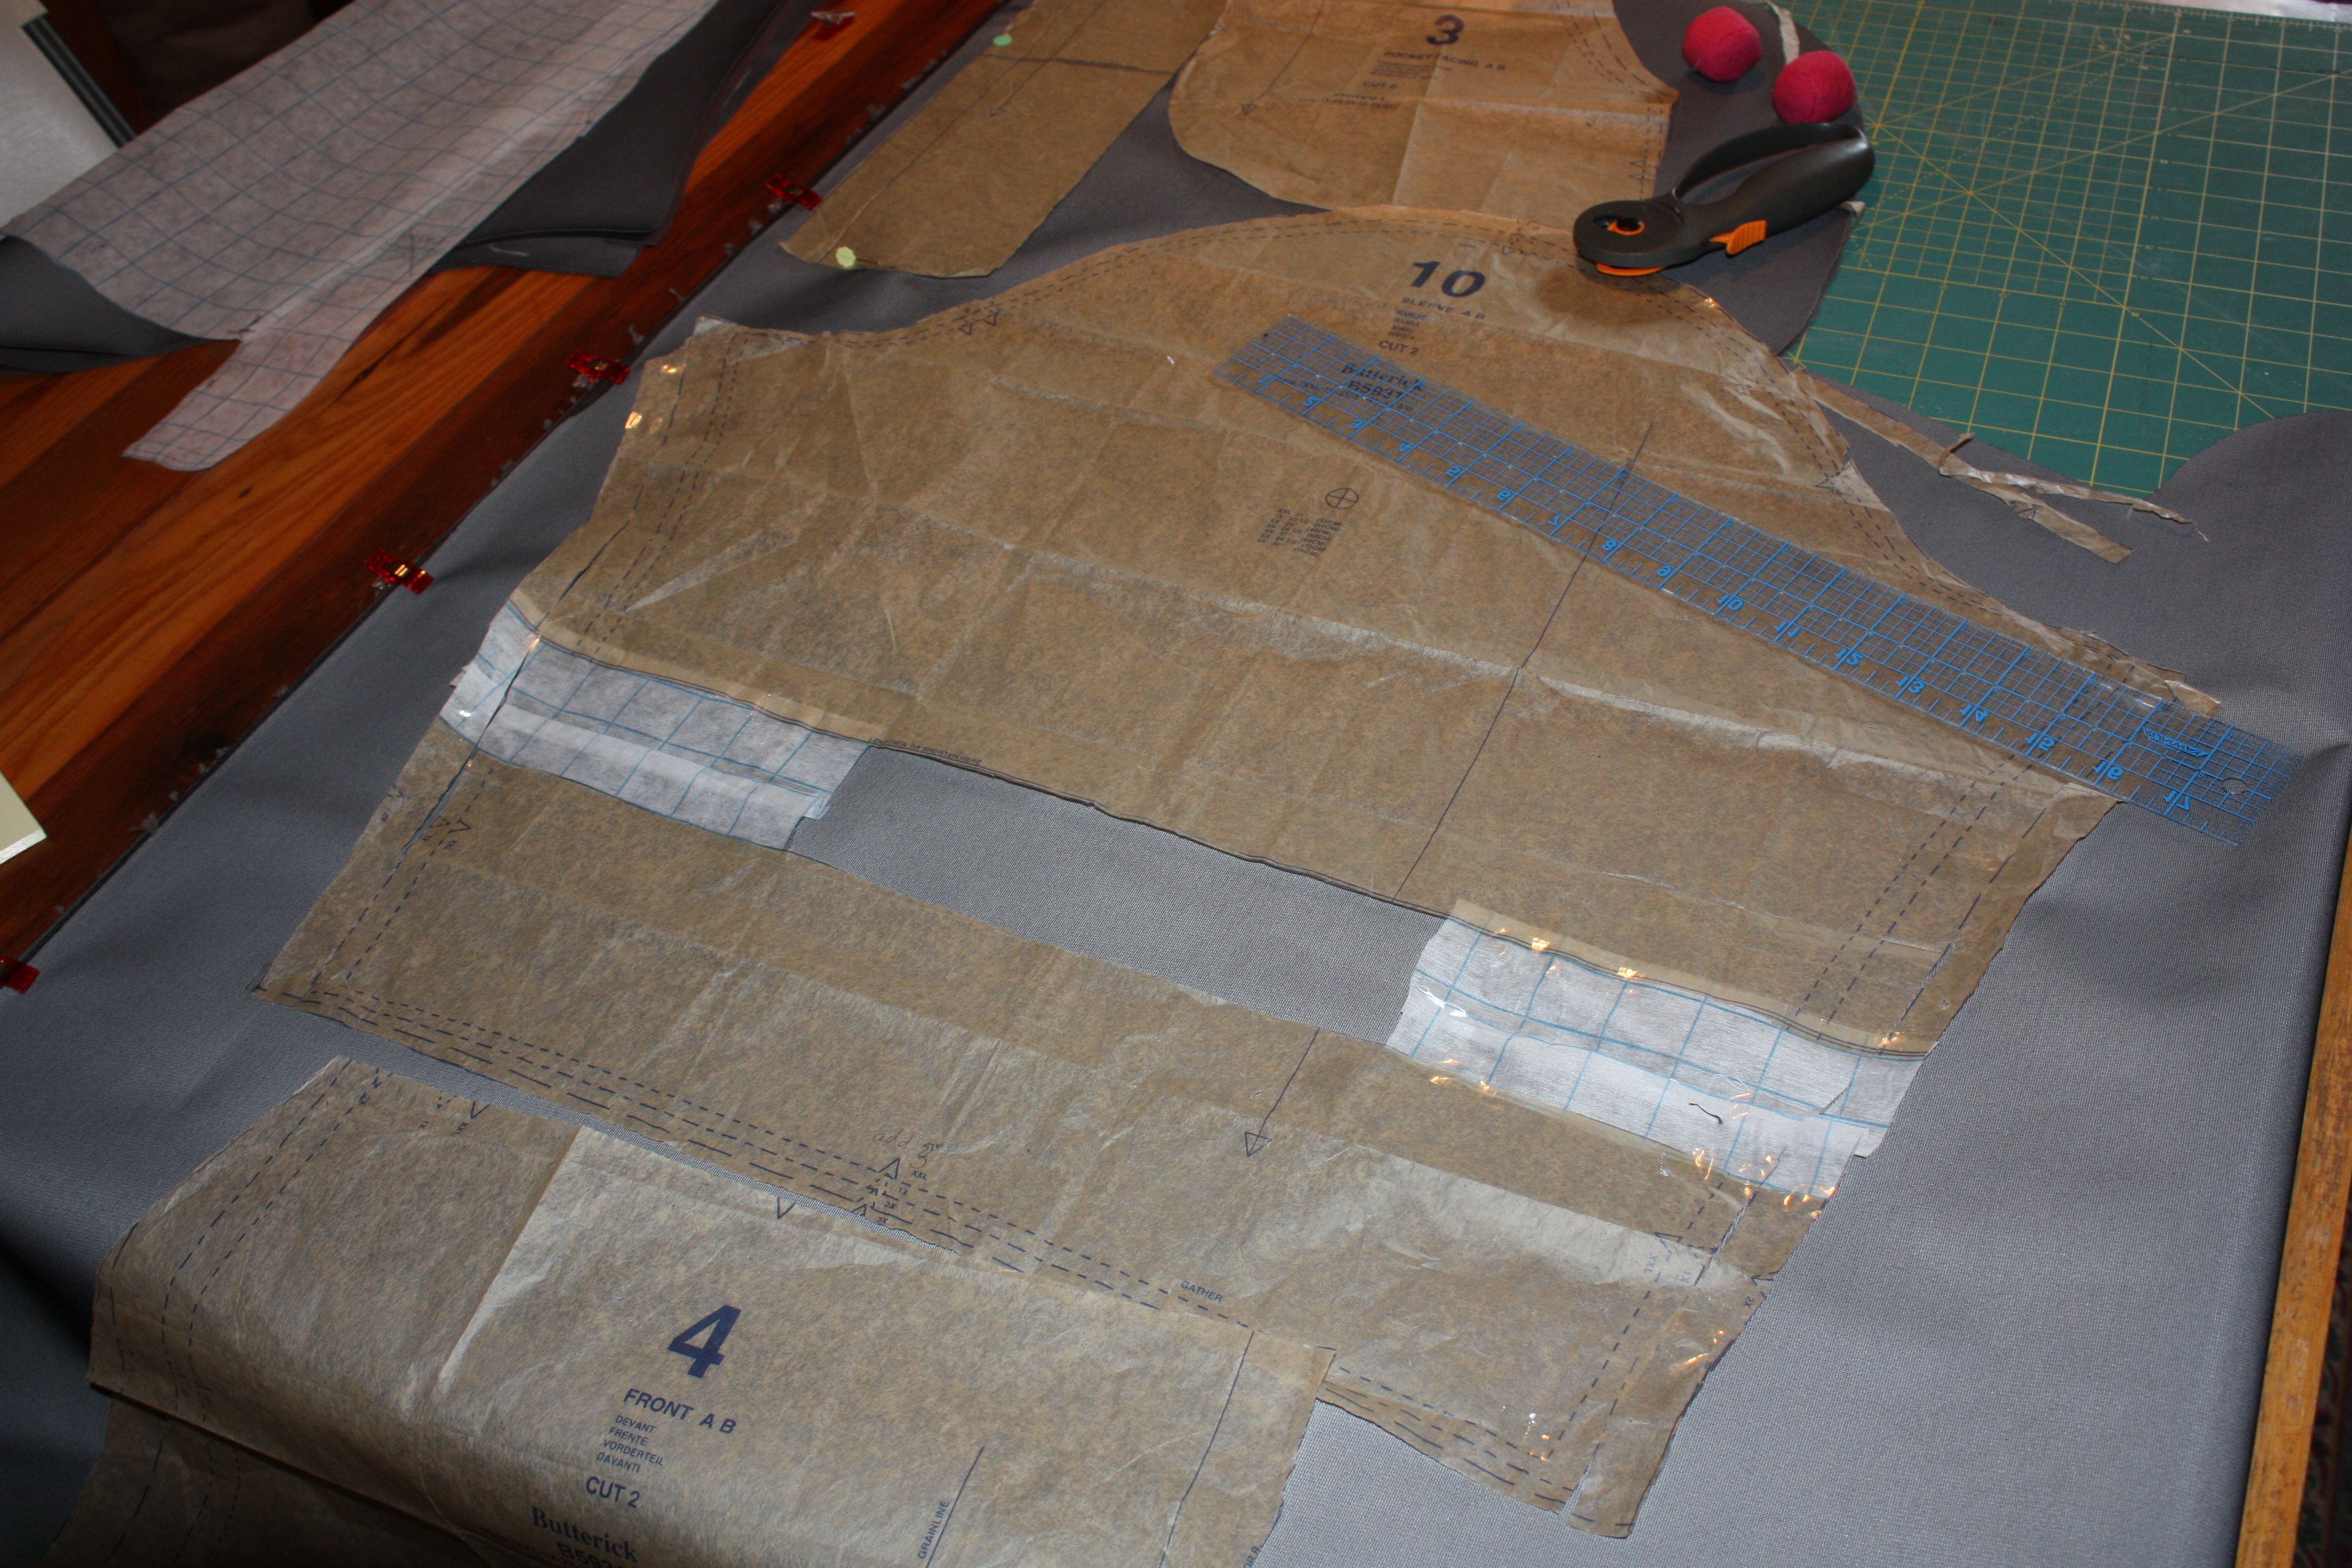
Here’s what the stitching looks like on this fabric:

Image

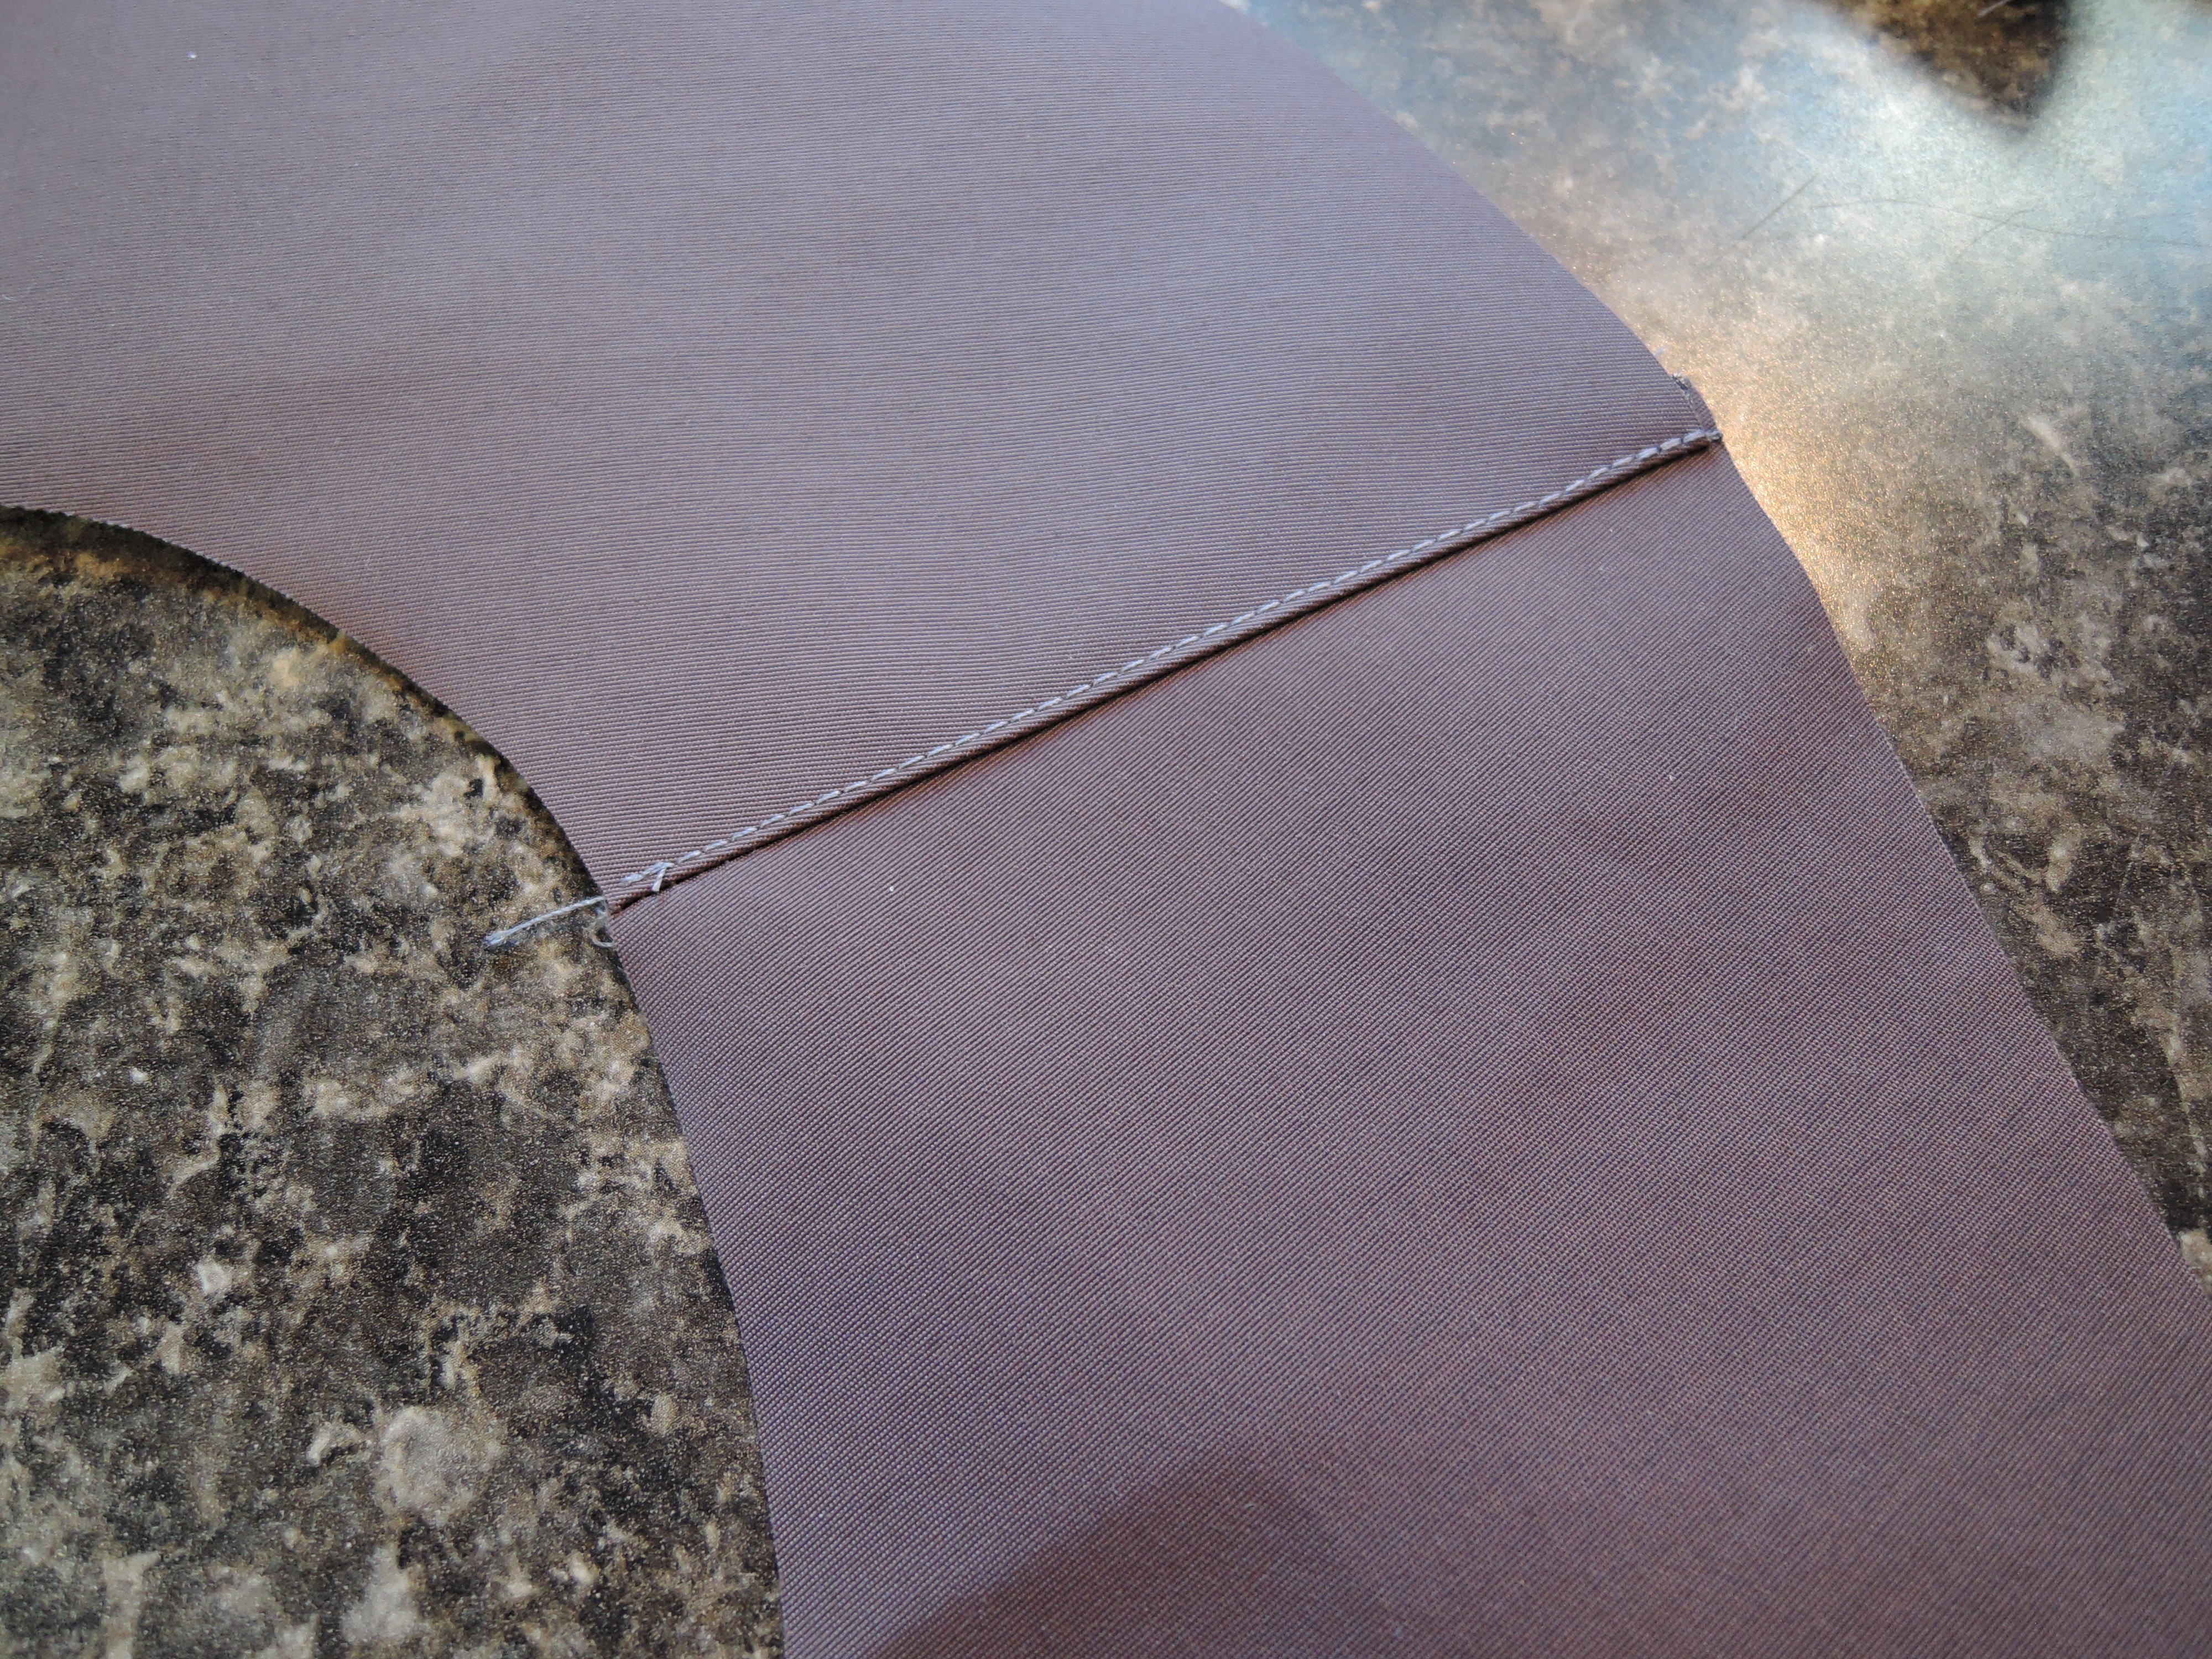
This fabric actually handles very nicely.  I tried hard to make a mess of it with a sample piece, which also shows the seam sealing tape.  I haphazardly sewed through multiple layers of the fabric, which I knew I’d have to do in the jacket (less haphazardly), and it worked fine.  The black edge is actually the selvage edge of the fabric.

DSCN0032
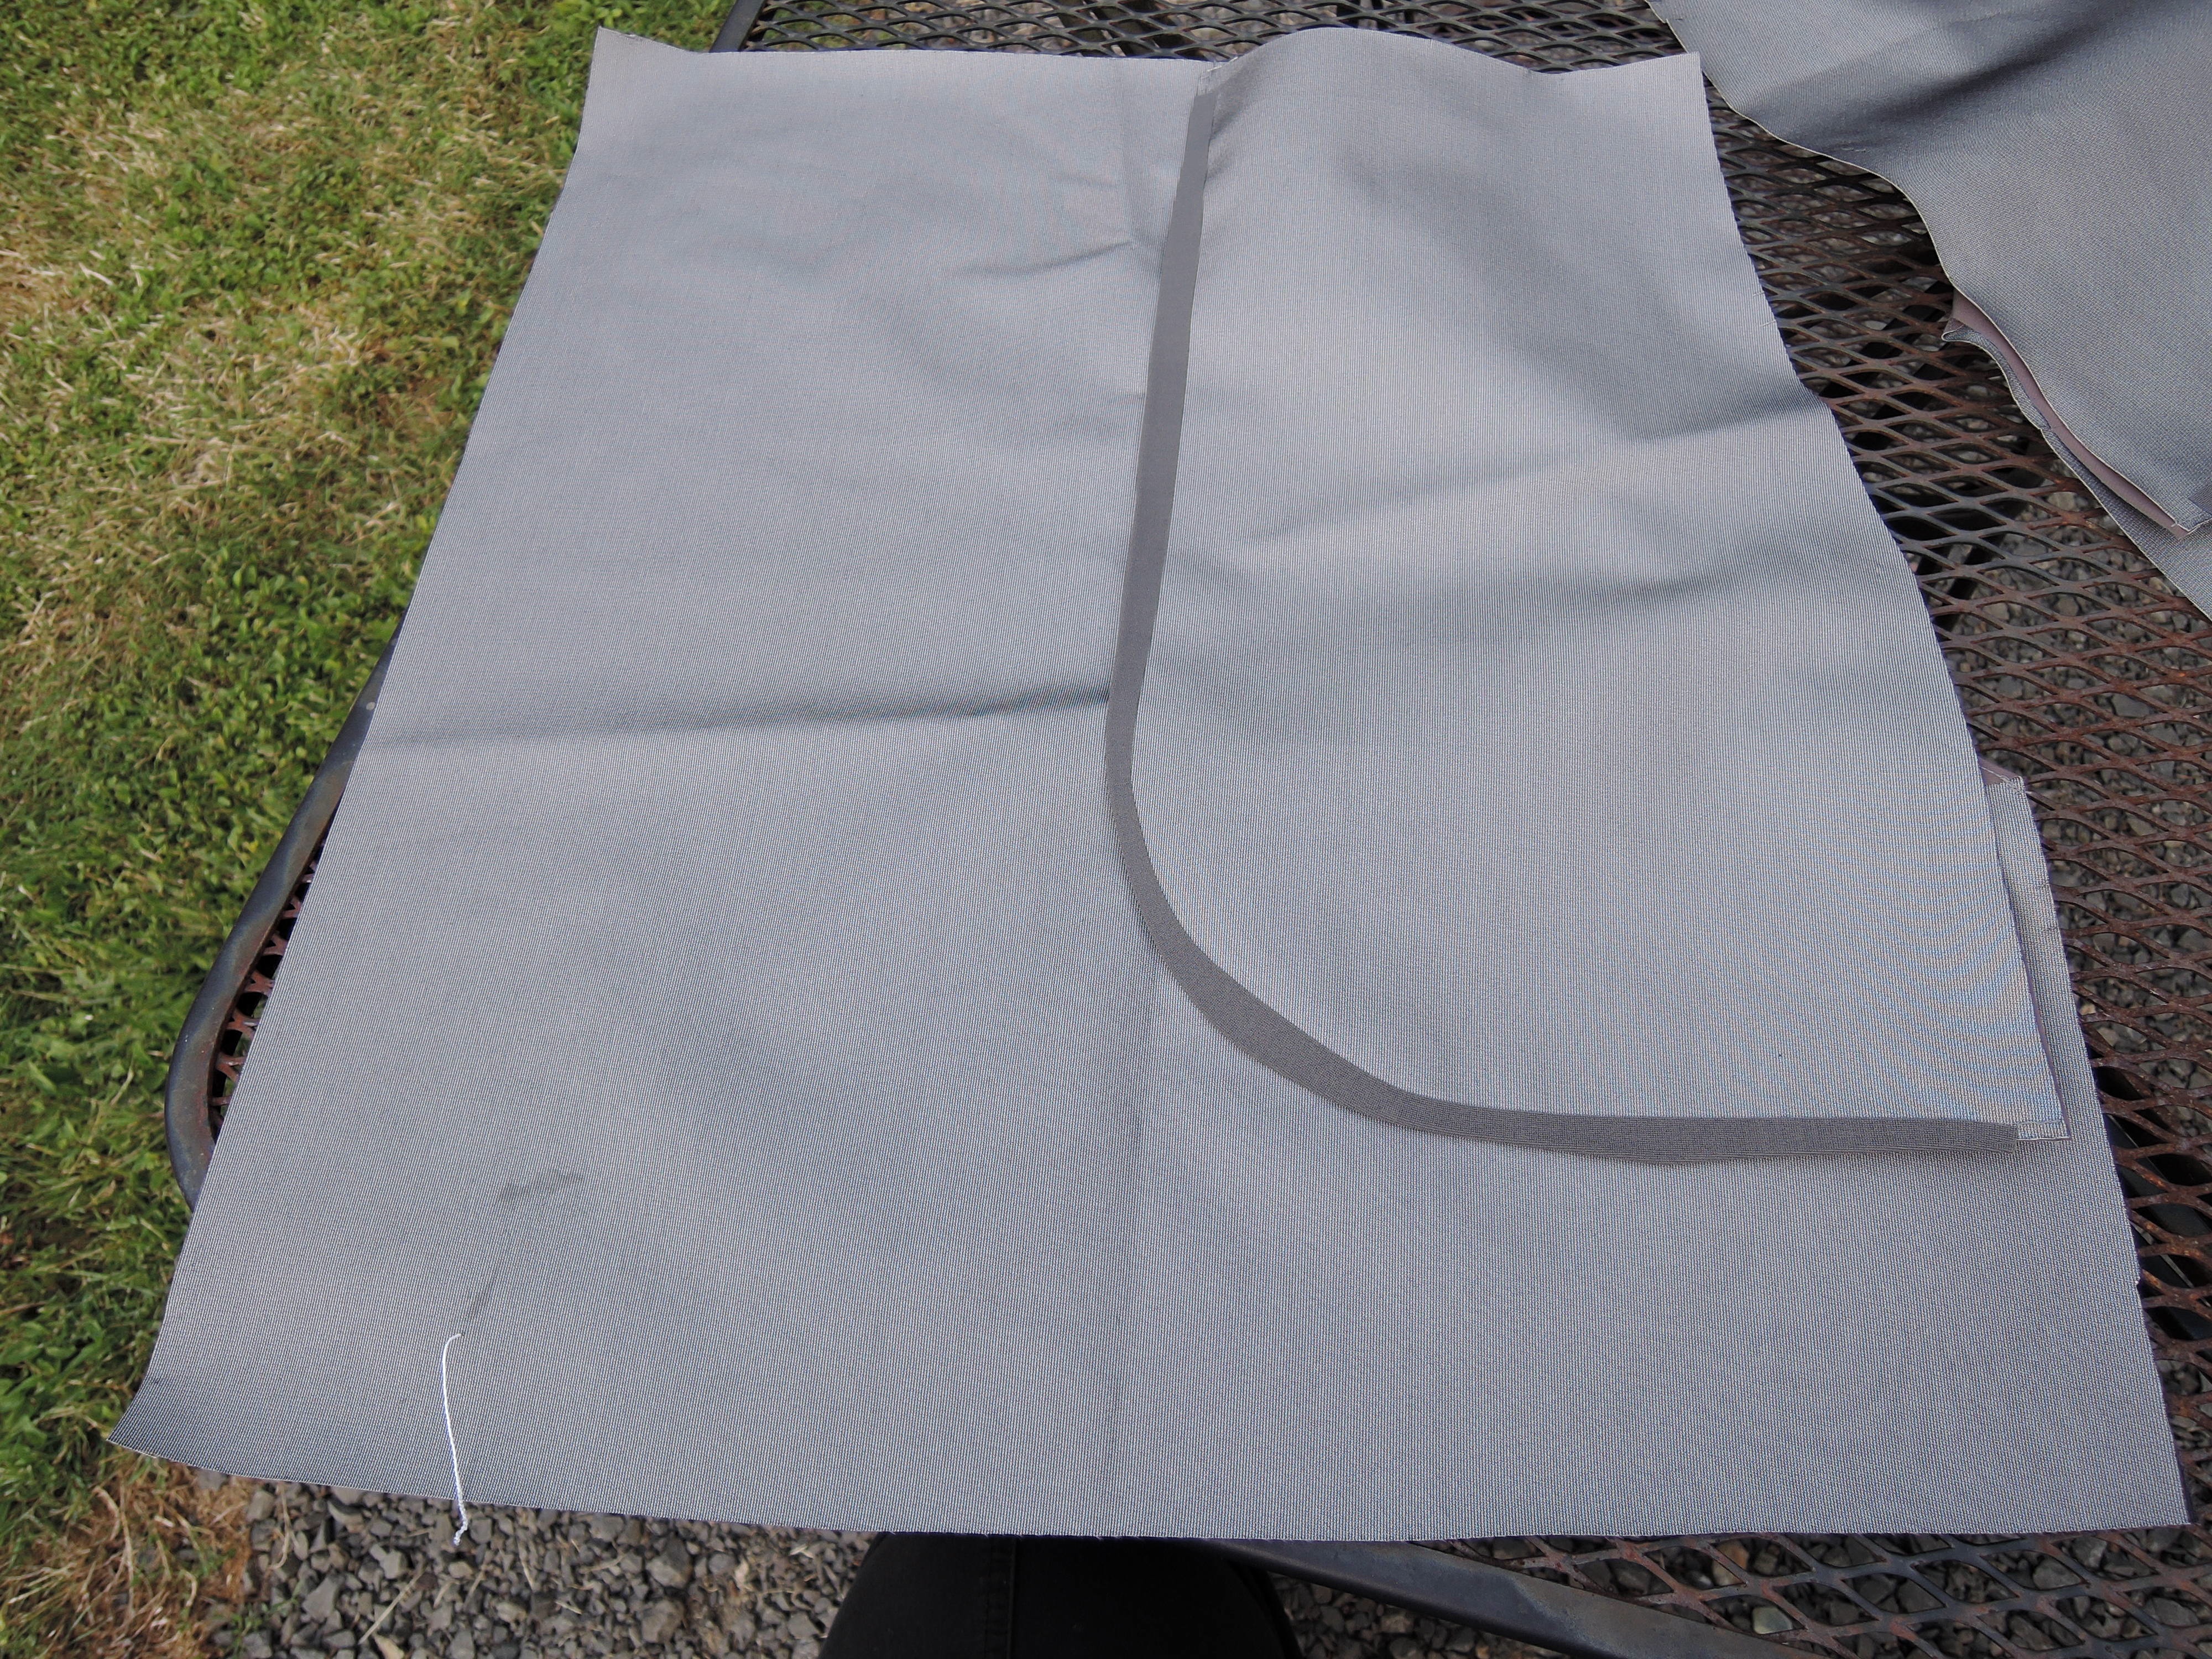
Here’s a photo of one side’s pocket done with seam sealing tape around the outer edge.

DSCN0037

A lot of the things that were recommended for sewing waterproof fabric I’m finding to be optional, due to my laziness.  First, the teflon presser foot, which I forgot about while testing.  Second, the non-stick pressing cloth.  I have not had any of the seam sealing tape stick to my iron.  Maybe if I ironed the wrong side of it some residue might get on the iron, but so far, so good.  I am using a Schmetz number 8 Microtex needle with regular polyester thread.  I realize I haven’t gotten to the hard part of the jacket–the hood, facing and zipper are sewn in one knock down, drag out scary seam, so this may change.

The only issue I’m having right now is with the bobbin tangling a bit.  I always hold the threads while starting a seam so I’m not sure what’s causing it.  Oh, I also wanted to show off my new camera‘s macro setting, which I’m loving.

DSCN0033


Such Fear! For What?

I laid out the pattern and cut the jacket out.  I can’t believe I avoided doing this for days, I was so fearful.  I ended up making 2 mistakes right off the bat!  But, because I’d ordered extra fabric, and could use one mistake to cut out some smaller pieces, I think all will be well.

Jacket Layout

The Sleeve Adjustments

This photo shows the lengthening of the sleeves I had to do.  I’m using the Clover Wonder Clips as well as only using pins in the seam allowances so I don’t pierce the waterproof layers.  I will review the clips soon.

I’m also on the road right now, and will be until October.  All my sewing stuff is with me.  I cut out 6 or 7 patterns before leaving, because cutting on the road seemed like it would be hard to do.  They’re all in separate plastic bags with their respective pattern instructions, notions and thread.

Since we only have one small table in our trailer on which to dine, compute and sew, nothing has happened yet.  It’s all in my mind.  The first thing I need to do is try sewing on the Ultrex fabric and ironing on the seam sealing tape as a test.  Just writing that puts a tiny knot my belly.

Wearable Muslin Jacket Is Finished

Jacket Front 2 I finished the wearable muslin jacket (Butterick 5931) and I did learn a few things from it.  I wanted to try some new seams and my first attempt fell flat, i.e., the flat-felled seams were a failure.  Flat-felled seams are the kind you see on the inner pant leg of jeans.  It was always a mystery how they were done as there are no raw edges in this type of seam.  I wanted to try it out on this jacket because I thought it would go with the denim look.  It’s the seam across the jacket’s yoke, which included the pocket front and back, and the lower front piece.  That came out to 6 layers of denim, which, when I finally trimmed the yoke seam, turned out to be too thick to work.  So, I changed it into a French seam.  I also decided not to top-stitch it for now, because of that thickness.

I ended up using several different seam finishes in this jacket because I alternated between impatience and obsessiveness.  For example, I used 1/4″ bias tape around the pocket seams, pinking and then stitching down the jacket facing, 1/2″ bias tape on the side seams, and overcast stitching around the armholes.  I also top-stitched wherever I felt like it, from 1/4″ away from a seam to 1/8″.  And, the sleeve seams are not finished at all for now!

Jacket Back

Issues with this pattern:

  • The sleeves are too short.  I assumed the models on the pattern cover where long-armed and that surely, the sleeves would be too long on me, as they always are, but they’re actually too short (for a long-sleeved jacket).
  • The facing is not under stitched.  I ended up top-stitching to compensate.
  • The set of the sleeve is pitched too far forward.  I should have reset them about an inch backwards, but got lazy.
  • The cuffs are very large, letting in a lot of air.

I don’t know if it’s just me, but I adjusted the ease to my measurements, and it felt like I was swimming in fabric.  I made the 3x, which should have worked.  So I cut the sides down even more.  It still feels too big overall, but I’m trying it out anyway.  Barbara Deckert says we’re all too used to close-fitting garments what with lycra in everything.

For my future goretex jacket I will need to add a drawstring to the hood, also making it meet in the center front.  I’m thinking of using some other patterns I’ve found and combining them.  I may also add a waist drawstring and add velcro fasteners for the cuffs.

Overexposed, but shows more detail:

Jacket Front

Image

Diving In

Diving In

I’m making a “wearable muslin” out of black stretch denim so I can later make a goretex jacket with the same pattern with modifications. Never made a jacket before! I’ll be trying out different seaming techniques. This is Connie Crawford’s Butterick 5931. I’m making a 3x.